The objective up to this point is to get enough of the engine and track built that I can run some hill-climbing tests. The results of these tests will determine how I build the track. Now that the running gear (axles and wheels) are in place, it’s time to install the motors and drive chains, and then to wire it up to see if it runs.
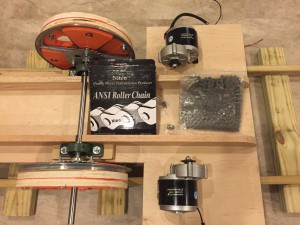
Here’s a look at where the motors will mount on the underside of the chassis. The first drive chain I purchased was too wide to fit within the tight clearances required. This is the replacement chain that’s more narrow in width. There are several different sizes of roller chain that vary in pitch and width; mine was determined by the size of the sprockets on the motors I purchased. I had to find drive sprockets to match.
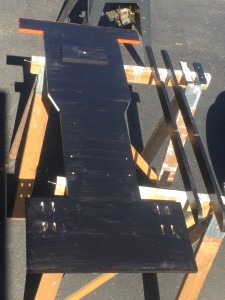
This is a look at the underside of the chassis (with everything removed for painting). Note the stiffening ribs on the right; also note the eight slotted holes for mounting the motors. Mounting the motors here will make the visible on the underside of the carriage when the train is running, but there’s nowhere else to put them without interfering with either cab space or the brake and throttle linkages.
Update
I’ve reassembled the underside of the chassis, including all of the running gear (wheels, axles, motors, and drive chains). Next step is to figure out where and how to install the batteries and electronics.
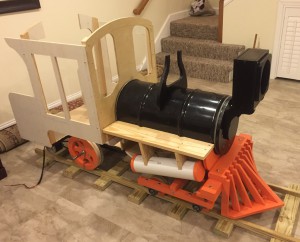
There’s lots of room inside the boiler (steel drum). But I’d have to cut holes in the steel to pass the wires. I’d rather keep the drum intact as much as I can to prevent flexing and rattling down the road (or track). Plus, wherever I mount the batteries, it needs to be reasonably accessible so I can remove them for recharging. This picture shows how the mock-up is shaping up.
There’s enough room under the catwalk to position the batteries, one on each side. This would make them fairly easy to remove for recharging. I can also cut a plywood mounting board for the electronic components to fit in the space under the catwalk. So that’s my plan (for now).
Next steps: Install the batteries and control unit, and run the wiring harness to get everything wired up!